How To Increase WordPress Website Speed Without Plugins (8 Ways)
Your WordPress site is slow and you want to increase its speed but without adding multiple plugins. This is possible and I will guide you step by step how you can do it.
Ideally, you might want just 1 plugin like Litespeed cache or wp rocket but this guide assumes that you do not want to add any plugin. Here are the steps that we will follow:
1.) Update WordPress and Your Existing Plugins To The Latest Versions
2.) Update to latest PHP version
3.) Optimize Tables On Myphp Interface
4.) Optimize Images On Your Website To Decrease The Size
5.) Set Up a Cloudflare Account For your Domain (The Right Way)
6.) Add Few Lines Of Code (Just Copy And Paste!)
7.) Ask To Move Your Site To Another Server (If Needed)
For that experiment, I will use another site that I have as a test one. I will try to optimize a certain page of it: https://www.cryptodaydream.com/why-does-bitcoin-have-value-and-why-its-value-will-increase-in-long-term/
We will focus on mobile speed since Google has mentioned they actually index only the mobile version of a site! As you understand your focus should be mobile users because traffic from these devices is rising every year. It has surpassed already the traffic that websites receive from desktop computers.
You can see here the exact statistics: https://gs.statcounter.com/platform-market-share/desktop-mobile-tablet . Mobile traffic is over 50%! Let’s move on to our experiment. You can check here the results of my test. I used Google Pagespeed Insights as you can see:

The overall score was 70, First Contentful Paint 2.5 seconds, Speed Index 5.1 seconds, Largest Contentful Paint 5.1 seconds, and Time to Interactive 5.5 seconds. I am using the Twenty Twenty theme which is the default one.
I would like to mention that you should do all the steps to see significant improvement but if i could choose only one then i would pick to set up a cloudflare account for my domain.
1.) Update WordPress and Your Existing Plugins To The Latest Versions
The first and easier step is to check if you actually run the latest versions of WordPress, your theme, and your plugins. Usually, the latest versions are faster and more stable. I don’t expect a huge increase in speed only because that but it is a step that we should not skip.

2.) Update to latest PHP version
This is a step that most of the average users won’t really know but it can have a significant impact on the site’s speed. You should back up your site before that change because in rare cases your site might crash. Most of the hosting providers use Cpanel for their interface. So, you need to find the section software > multiPHP manager > PHP Version and update it to the latest one.
If your hosting provider doesn’t use cpanel then you can just google the name of your provider + change php version or search directly to their help page or faq section. In any case, your hosting provider will let you to update the PHP Version. Reach out to support if you can’t find what you want.
Here is how the interface looks like:
3.) Optimize Tables On MyPhP Interface
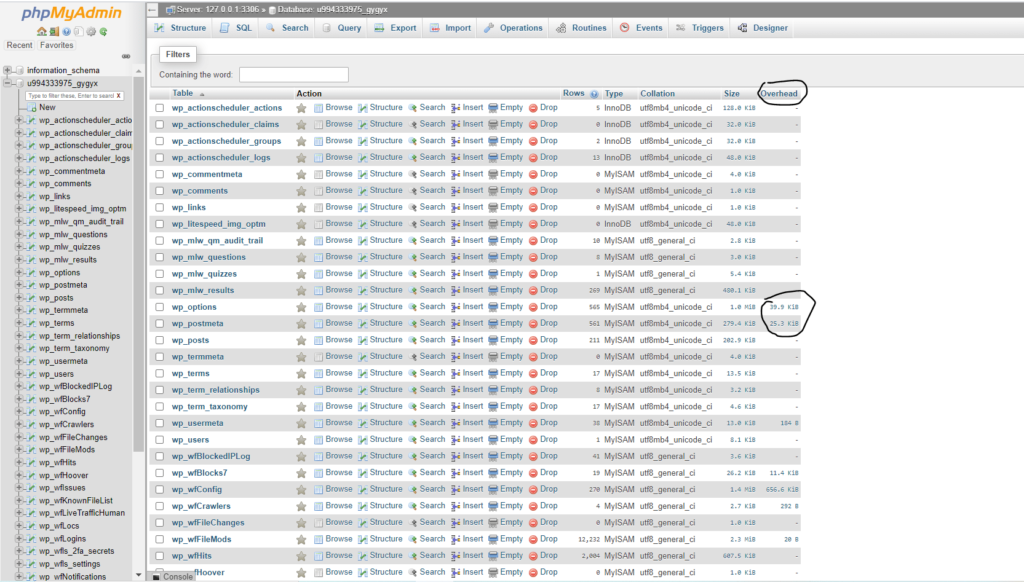
This step will help if you haven’t done it before and your site is up and running for months or years. You need to locate phpMyadmin section and if you use Cpanel you will find it under databases. Every hosting provider is offering you access to this section. Search on google for the specific provider or on their faq/help page in case you can’t find it.
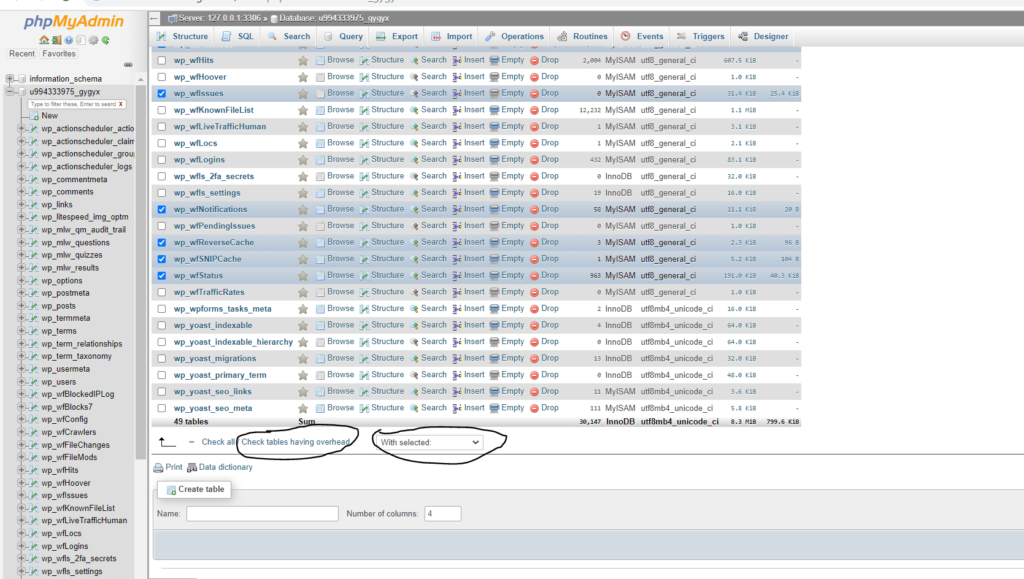
This is what you see on phpMyadmin interface, scroll to the bottom to see your available options. Choose “check tables having overhead” and then “with selected” choose “optimize table”.
4.) Optimize Images On Your Website To Decrease The Size
This is a very crucial step since bigger images in size means that they take much more time to load. Good images contribute to the overall user experience so it is nice to include on your pages or posts. However, you should cross-check if you can decrease an image’s size without affecting the quality a lot.
Try not to include a big image in terms of size (at kb or MB) at the top of your page. You can see the size of a picture on the bottom of the page (on windows) in the file explorer section. You can also press right-click > properties to see that detail. Try to decrease images to 200kb at least, especially your top one! If you can’t do it for a certain image then pick another.

These are the 3 sites I use to optimize my images: https://compresspng.com/ , https://tinypng.com/ , https://compressimage.toolur.com/ . They are easy to use since you just upload your images and then after the compression, you download the smaller version. I prefer png format pictures since they are usually smaller.
Images. graphics and videos make your website slower so try to use them only when they are absolutely necessary. People are trying to impress with their website design and sometimes that leads to very slow web pages. So, the user leaves the page before he sees any of the fancy things you have prepared.
5.) Set up a Cloudflare account For your Domain (The Right Way)
Using a CDN such as Cloudflare will speed up your site a lot. Cloudflare stores a copy of your website and distributes these copies in different servers worldwide. So, based on your online visitor’s location the closest server will deliver the content to him. This approach contributes to your website speed.
Most of the hosting providers have a different section where you can activate Cloudflare for your domain. If you are using Cpanel then you can find the Cloudflare option under software. If you can’t do it like that then you can visit directly cloudflare.com. In both cases, you will need to create a new account with Cloudflare if you don’t have one.
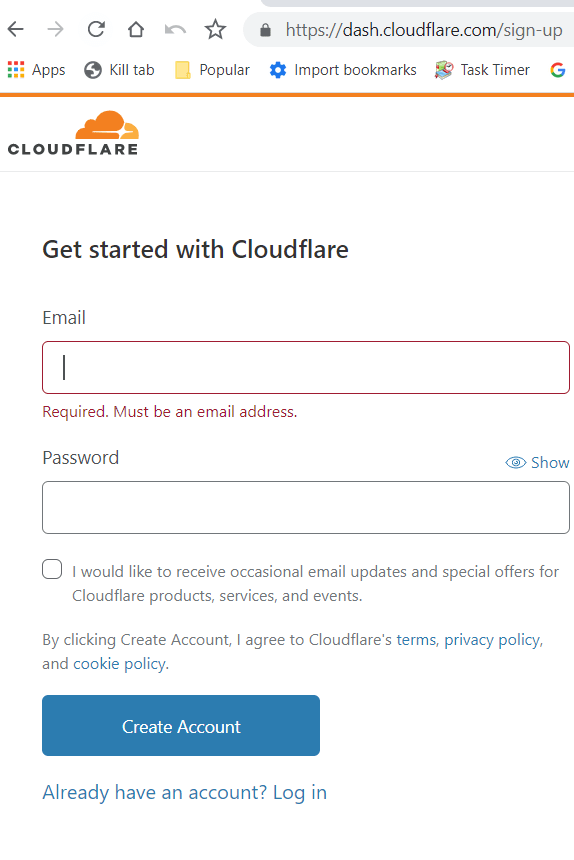
Sign up for cloudflare.com.
Add your site.

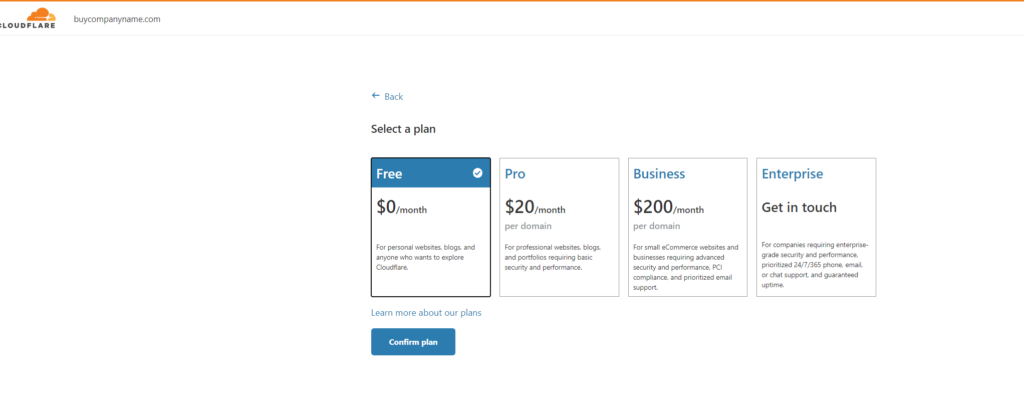
Choose the free plan since it is more than enough for what we want to accomplish.
Cloudflare will scan for your existing dns settings.
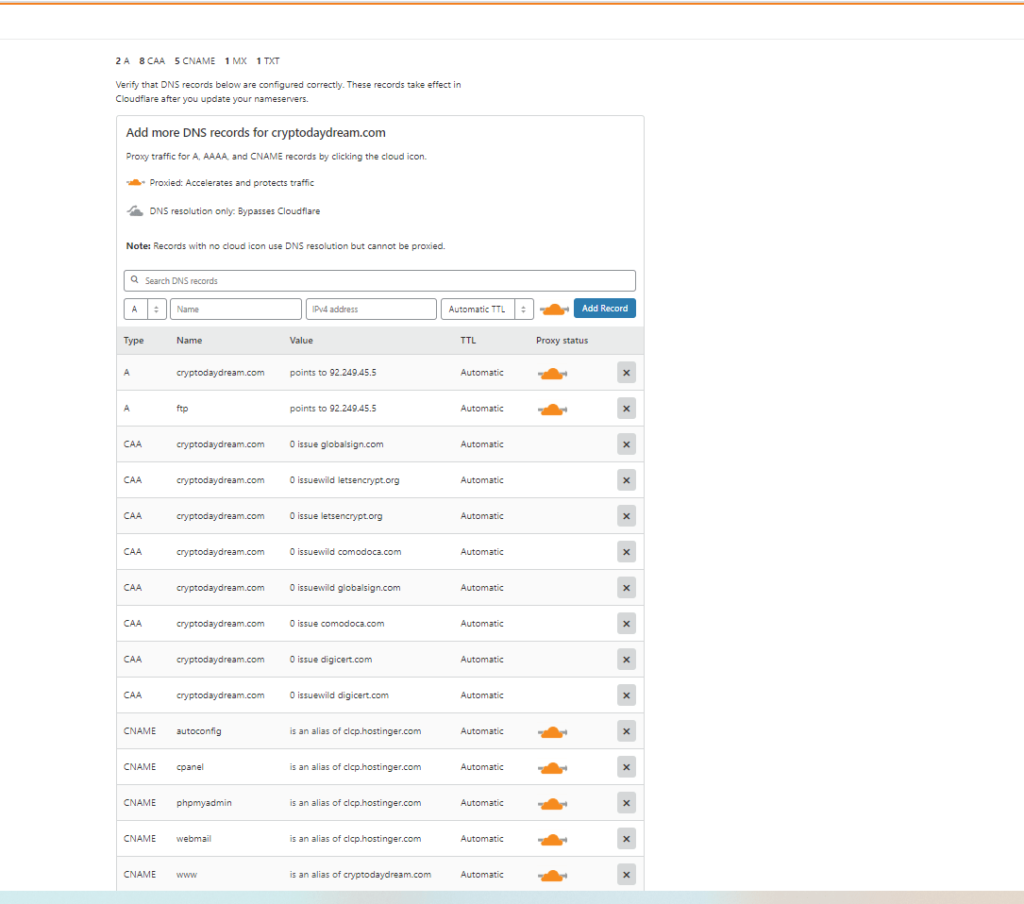
After the scan “continue” to the next step.
You will see different details here than what i see! Follow exactly the information you see on your side and don’t rely on the next screenshot. You will need to visit your domain registrar (Godaddy, Namecheap or even your hosting provider). Your domain registrar is the one you bought your domain from.
Cloudflare will guide you and the first step will mention “Log in to your ****** Account”. In my case, I have the domain registered on Namecheap but probably you have a different provider. To adjust the necessary settings you should locate a section with the name DNS or Nameservers under a specific domain.
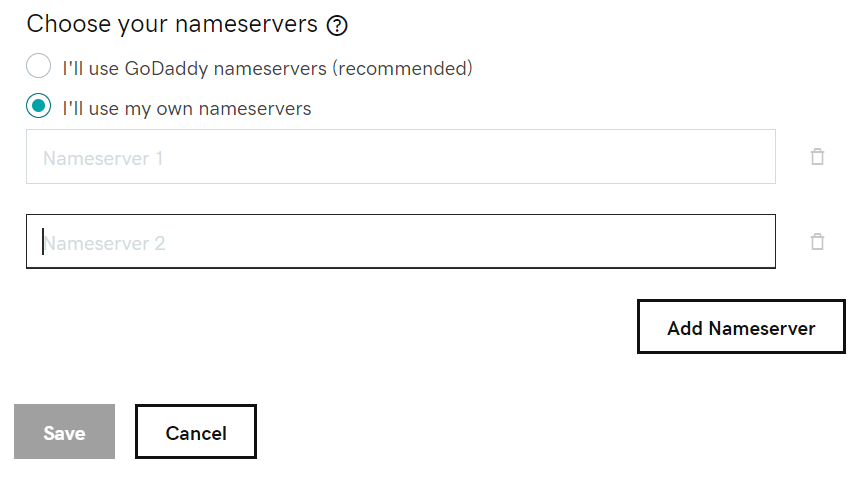
If your domain is on GoDaddy then after you login choose your name on the up-right and a new menu will appear. Click on the “manage domains” section to see all your domains. Choose your domain > DNS > update nameservers and update them with the nameservers you see on your Cloudflare account.
It will take from some minutes to some hours for your nameservers to get updated. The usual case is to wait just some minutes instead of hours.


For Namecheap choose “domains list”, click on your domain and choose custom DNS. After you add the cloudflare nameservers choose the green “tick” symbol to save your settings.

You can re-check from time to time to find out if the nameservers were updated. Take a look at the Cloudflare interface > overview section and the “recheck now” option.
Ok, let’s see now the ideal Cloudflare settings for each tab. For SSL/TLS encryption mode choose “full (strict)” unless you don’t use ssl (big mistake!) then you can choose flexible.

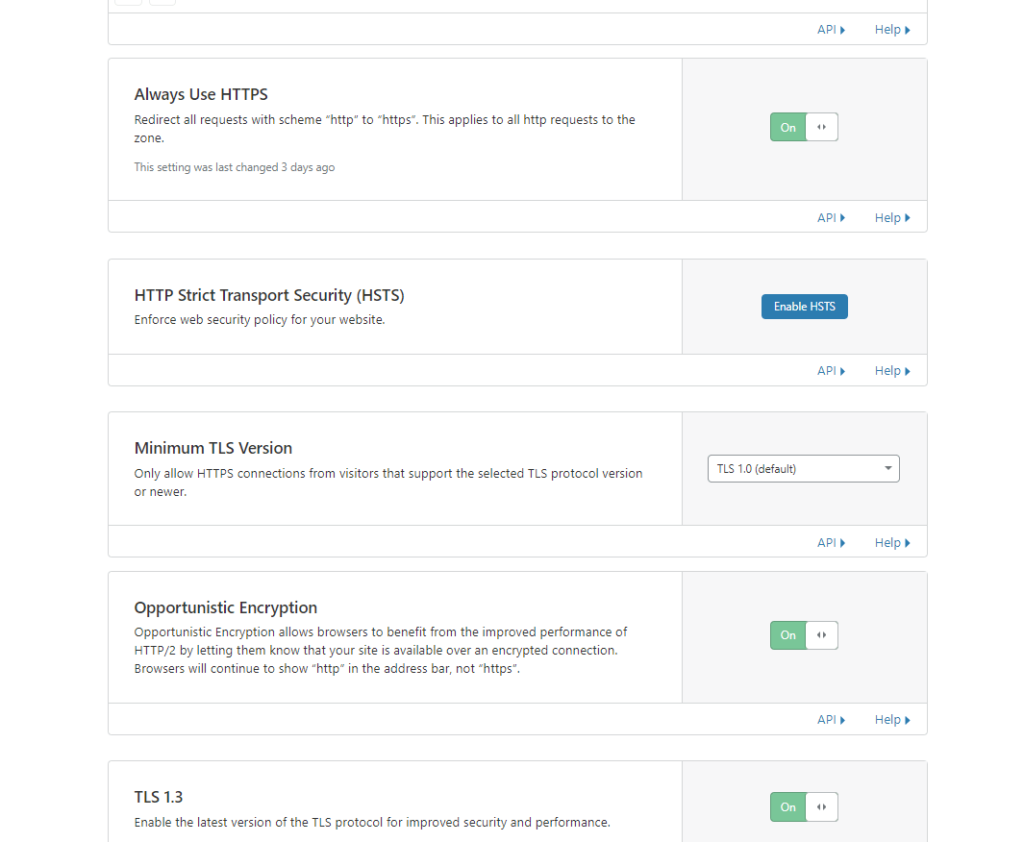
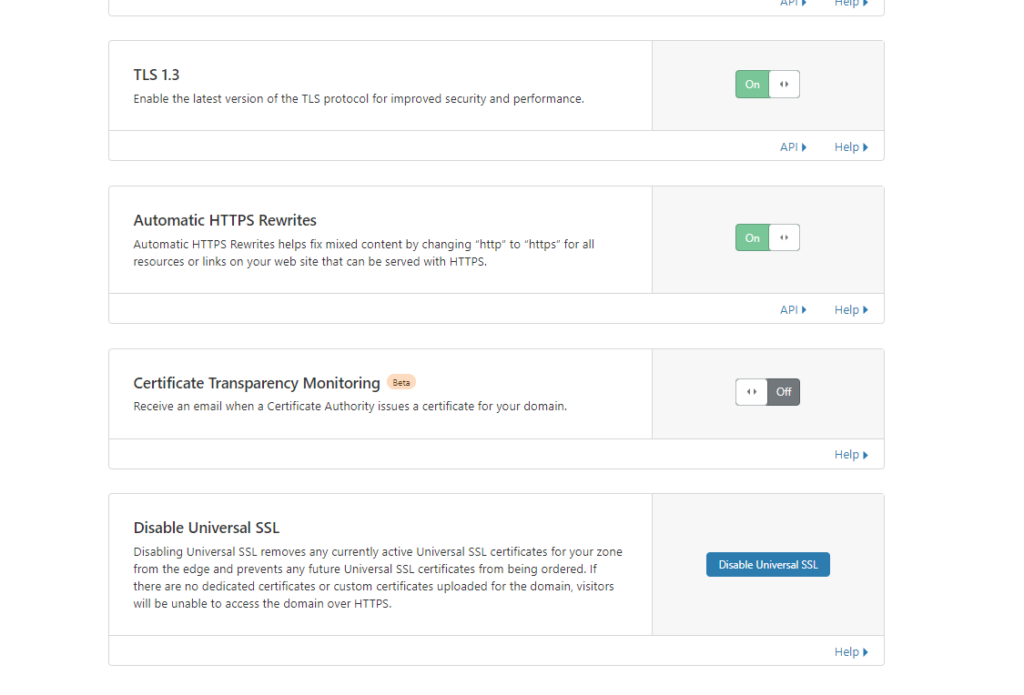
On SSL/TLS > Edge Certificates choose the following options Always Use HTTPS > on , Opportunistic Encryption > on, TLS 1.3 > on, Automatic HTTPS Rewrites > on
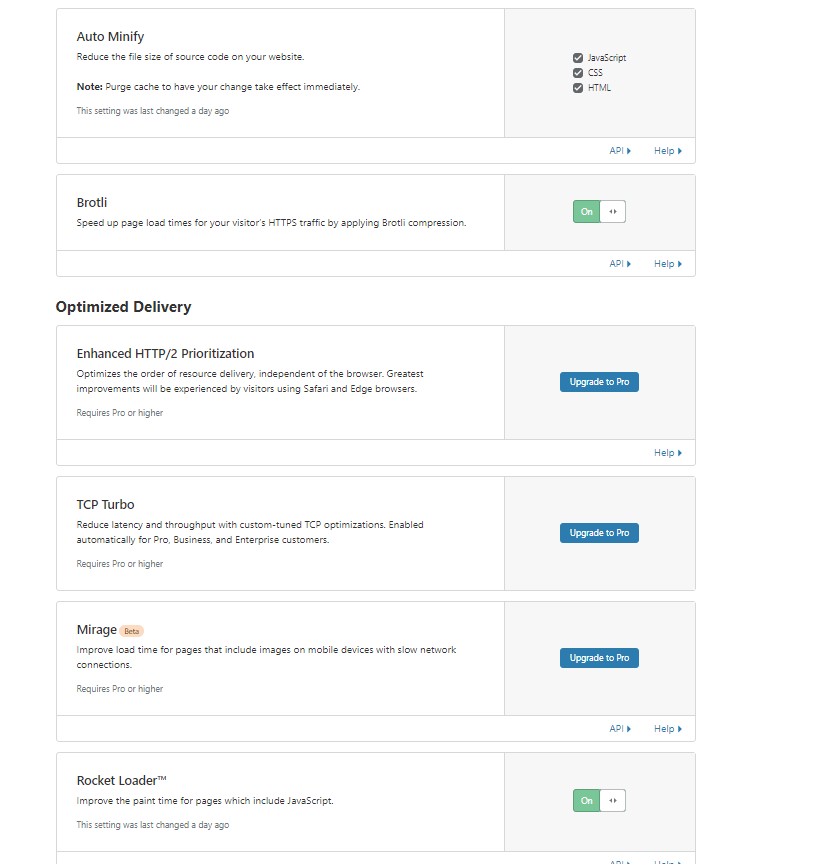
On Speed > Optimization section tick all the options for “Auto Minify”. Set Brotli > on, and Rocket Loader > on.
Under network section we set HTTP/3 (with QUIC) > on and HTTP/2 > on, we don’t care so much for the rest.

Finally, we come to the crucial part that you should not skip! The “page rules” section will do some very good things for your website speed. I would like to mention that all these tricks come from a specific blog that helped me to speed up my sites a lot.
You can take a look at that https://pagespeedtweaks.com/cloudflare-setup . I don’t have any affiliation with the owner but he has some very cool tricks!
Ok this is how your final result should look like:
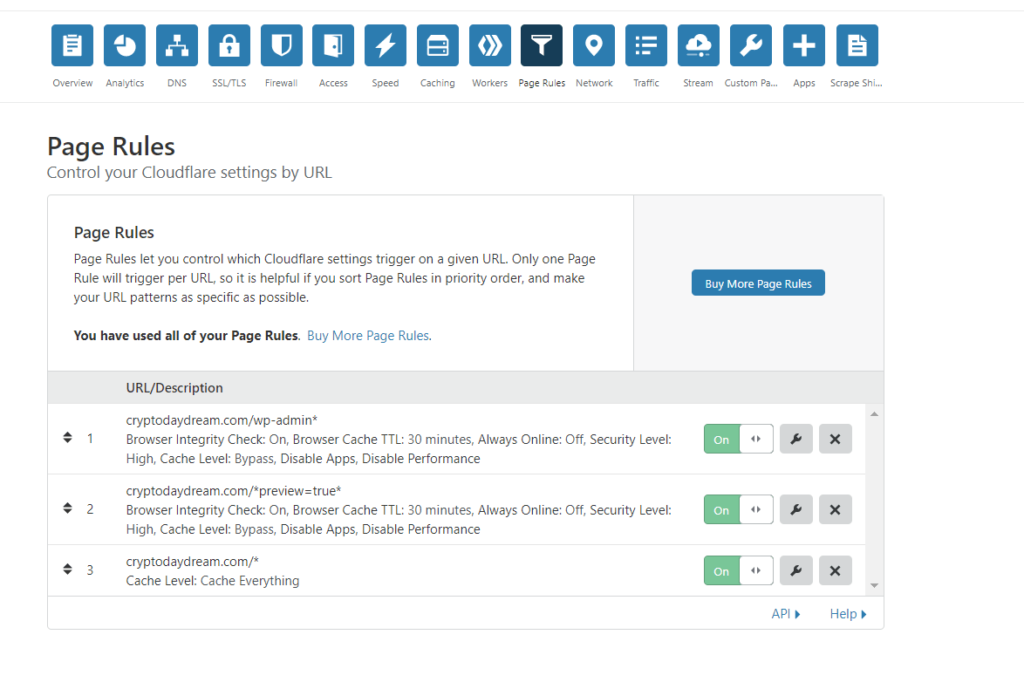
Every rule should be placed with that order or else you will not have good results. Of course you will replace the site you see with your domain.
Create your first page rule as you see.

Move on with the second one and save it.
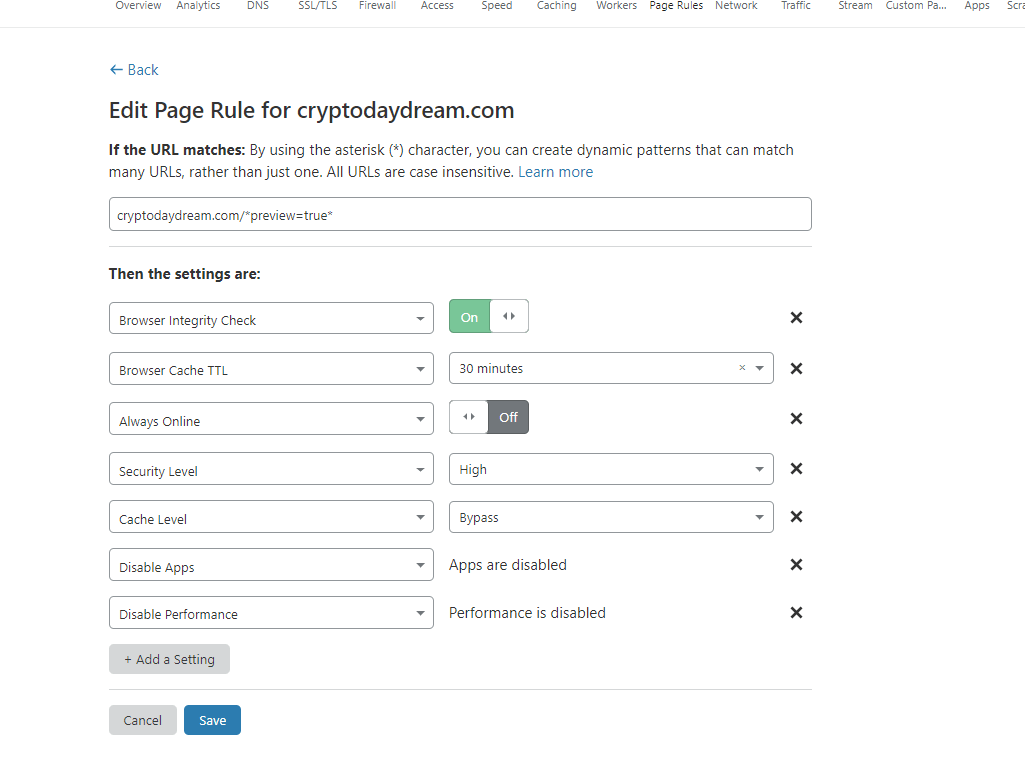
And the final url where you will see the biggest improvement on website speed.

6.) Add Few Lines Of Code (Just Copy And Paste!)
Since you don’t want to use a plugin we will mimic some of their functions with some coding. I took the advice from another very good blog:
namehero.com/startup/the-right-way-to-load-javascript-in-wordpress-without-a-plugin/
namehero.com/startup/how-to-inline-and-defer-css-on-wordpress-without-plugins/
First, you need to locate on your WordPress backend the section Appearance > Theme Editor. Your next move should be to choose Theme Functions (functions.php) on your right.
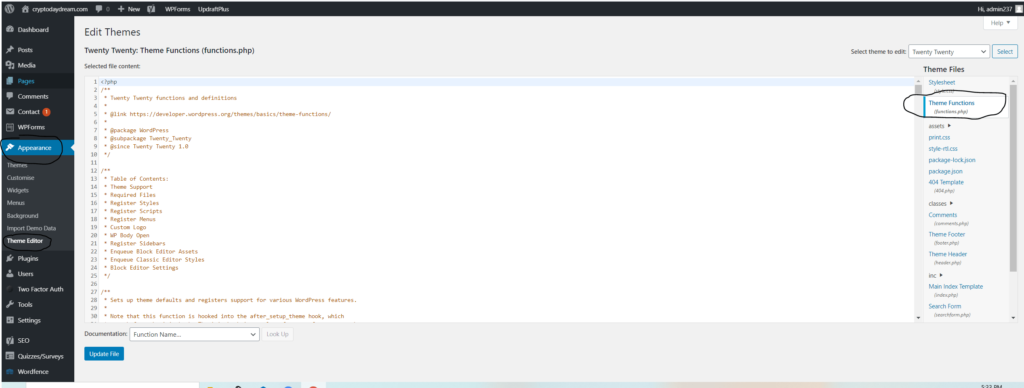
Add this code snippet on the bottom of your the section. This snippet will help the browsers (such as chrome) to handle better your site’s CSS and javascript. Back up your site just in case you don’t paste the code correctly.
function add_defer_to_jquery( $tag, $handle, $src ) {

    if (is_admin())
      return $tag;

    if ( strpos($handle, 'jquery-core') === false ) {
        return str_replace( ' src=', ' defer="defer" src=', $tag );
    }

    return $tag;
}
function add_rel_preload($html, $handle, $href, $media) {

    if (is_admin())
        return $html;

     $html = <<<EOT
<link rel='preload' as='style' onload="this.onload=null;this.rel='stylesheet'" id='$handle' href='$href' type='text/css' media='all' />
EOT;
    return $html;
}
add_filter( 'style_loader_tag', 'add_rel_preload', 10, 4 );
7.) Ask To Move Your Site To Another Server (If Needed)
Sometimes if you have purchased a shared hosting plan, your site might be sharing resources with too many other websites. Even a hacker attack on another site on the same server can cause issues to your site. That happened to me on the past and i asked from my provider to move my site to another server.
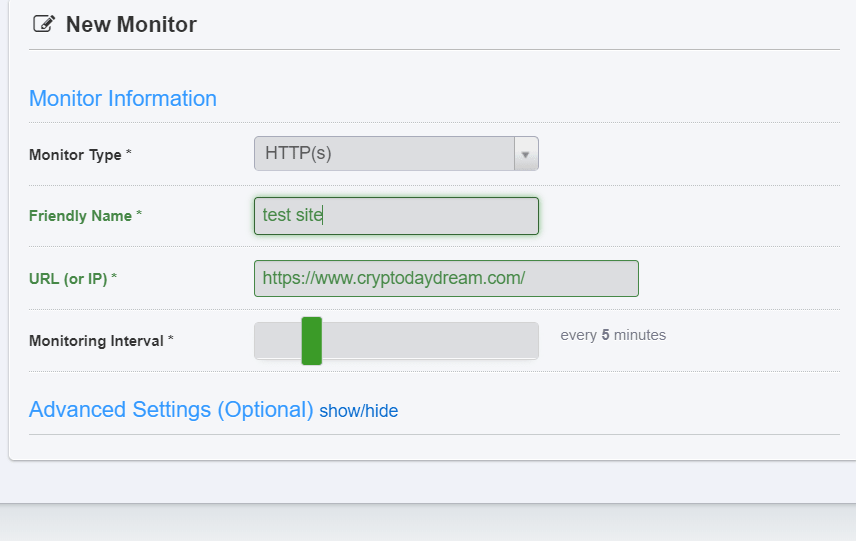
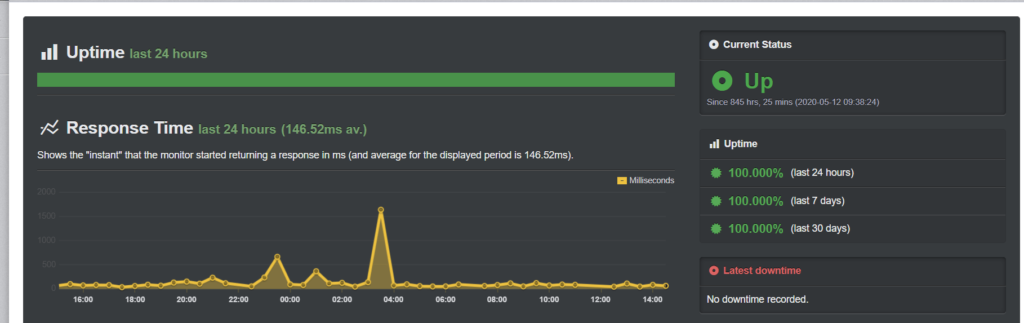
This move helped a lot with website speed. Another solution is to change a provider or use another type of hosting such as cloud,VPS, or dedicated hosting. I am using that site https://uptimerobot.com/ to track my server response time 24 hours per day but you can use any similar one.
The response time of the server contributes to the website speed. I would say that under 200ms is a good benchmark.
8.) Change Theme (If Needed)
Your wordpress theme is very important for your website speed. In my opinion choose the simplest theme you can find as long as it has the functions you really need. Don’t overcomplicate your website design if this is not necessary.
Cross check that your theme is updated in regular internals and not only once a year!
Final Words
Ok, let’s see if we managed to increase the website speed in my case. As it looks like the speed increased to 94 from 70! Let’s compare the individual metrics too:
| Metrics | Before Optimization | After Optimization |
| Overall Speed | 70 | 94 |
| First Contentful Paint | 2.5s | 2.0s |
| Speed Index | 5.1s | 2.8s |
| Largest Contentful Paint | 5.1s | 2.3s |
| Time to Interactive | 5.5s | 4.5s |
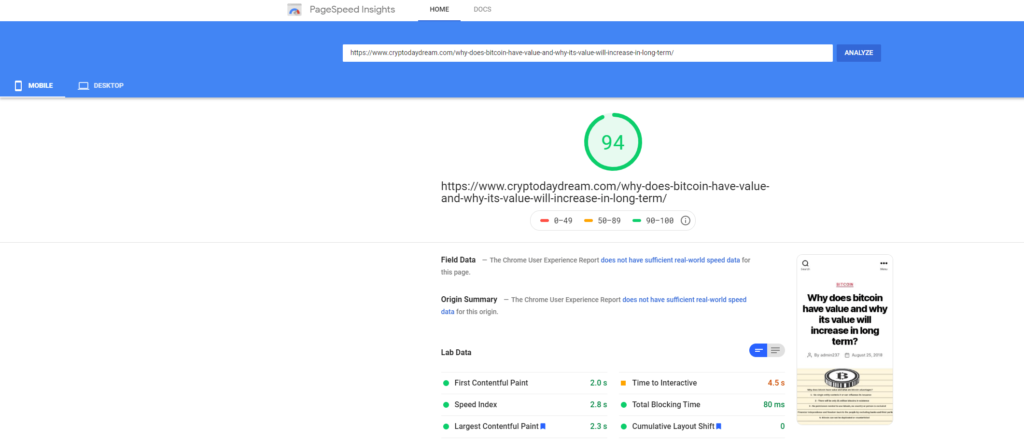
There is a significant improvement without the need of additional plugins!
I hope the post was helpful and you managed to speed up your WordPress site without plugins! If you are searching for a quality hosting provider for your WordPress website check my previous post: https://www.buycompanyname.com/buy-domain-name-and-hosting/